Connecting a QuickBooks Desktop client to Uncat
Written By Brandon Bruce
Adding your first client:
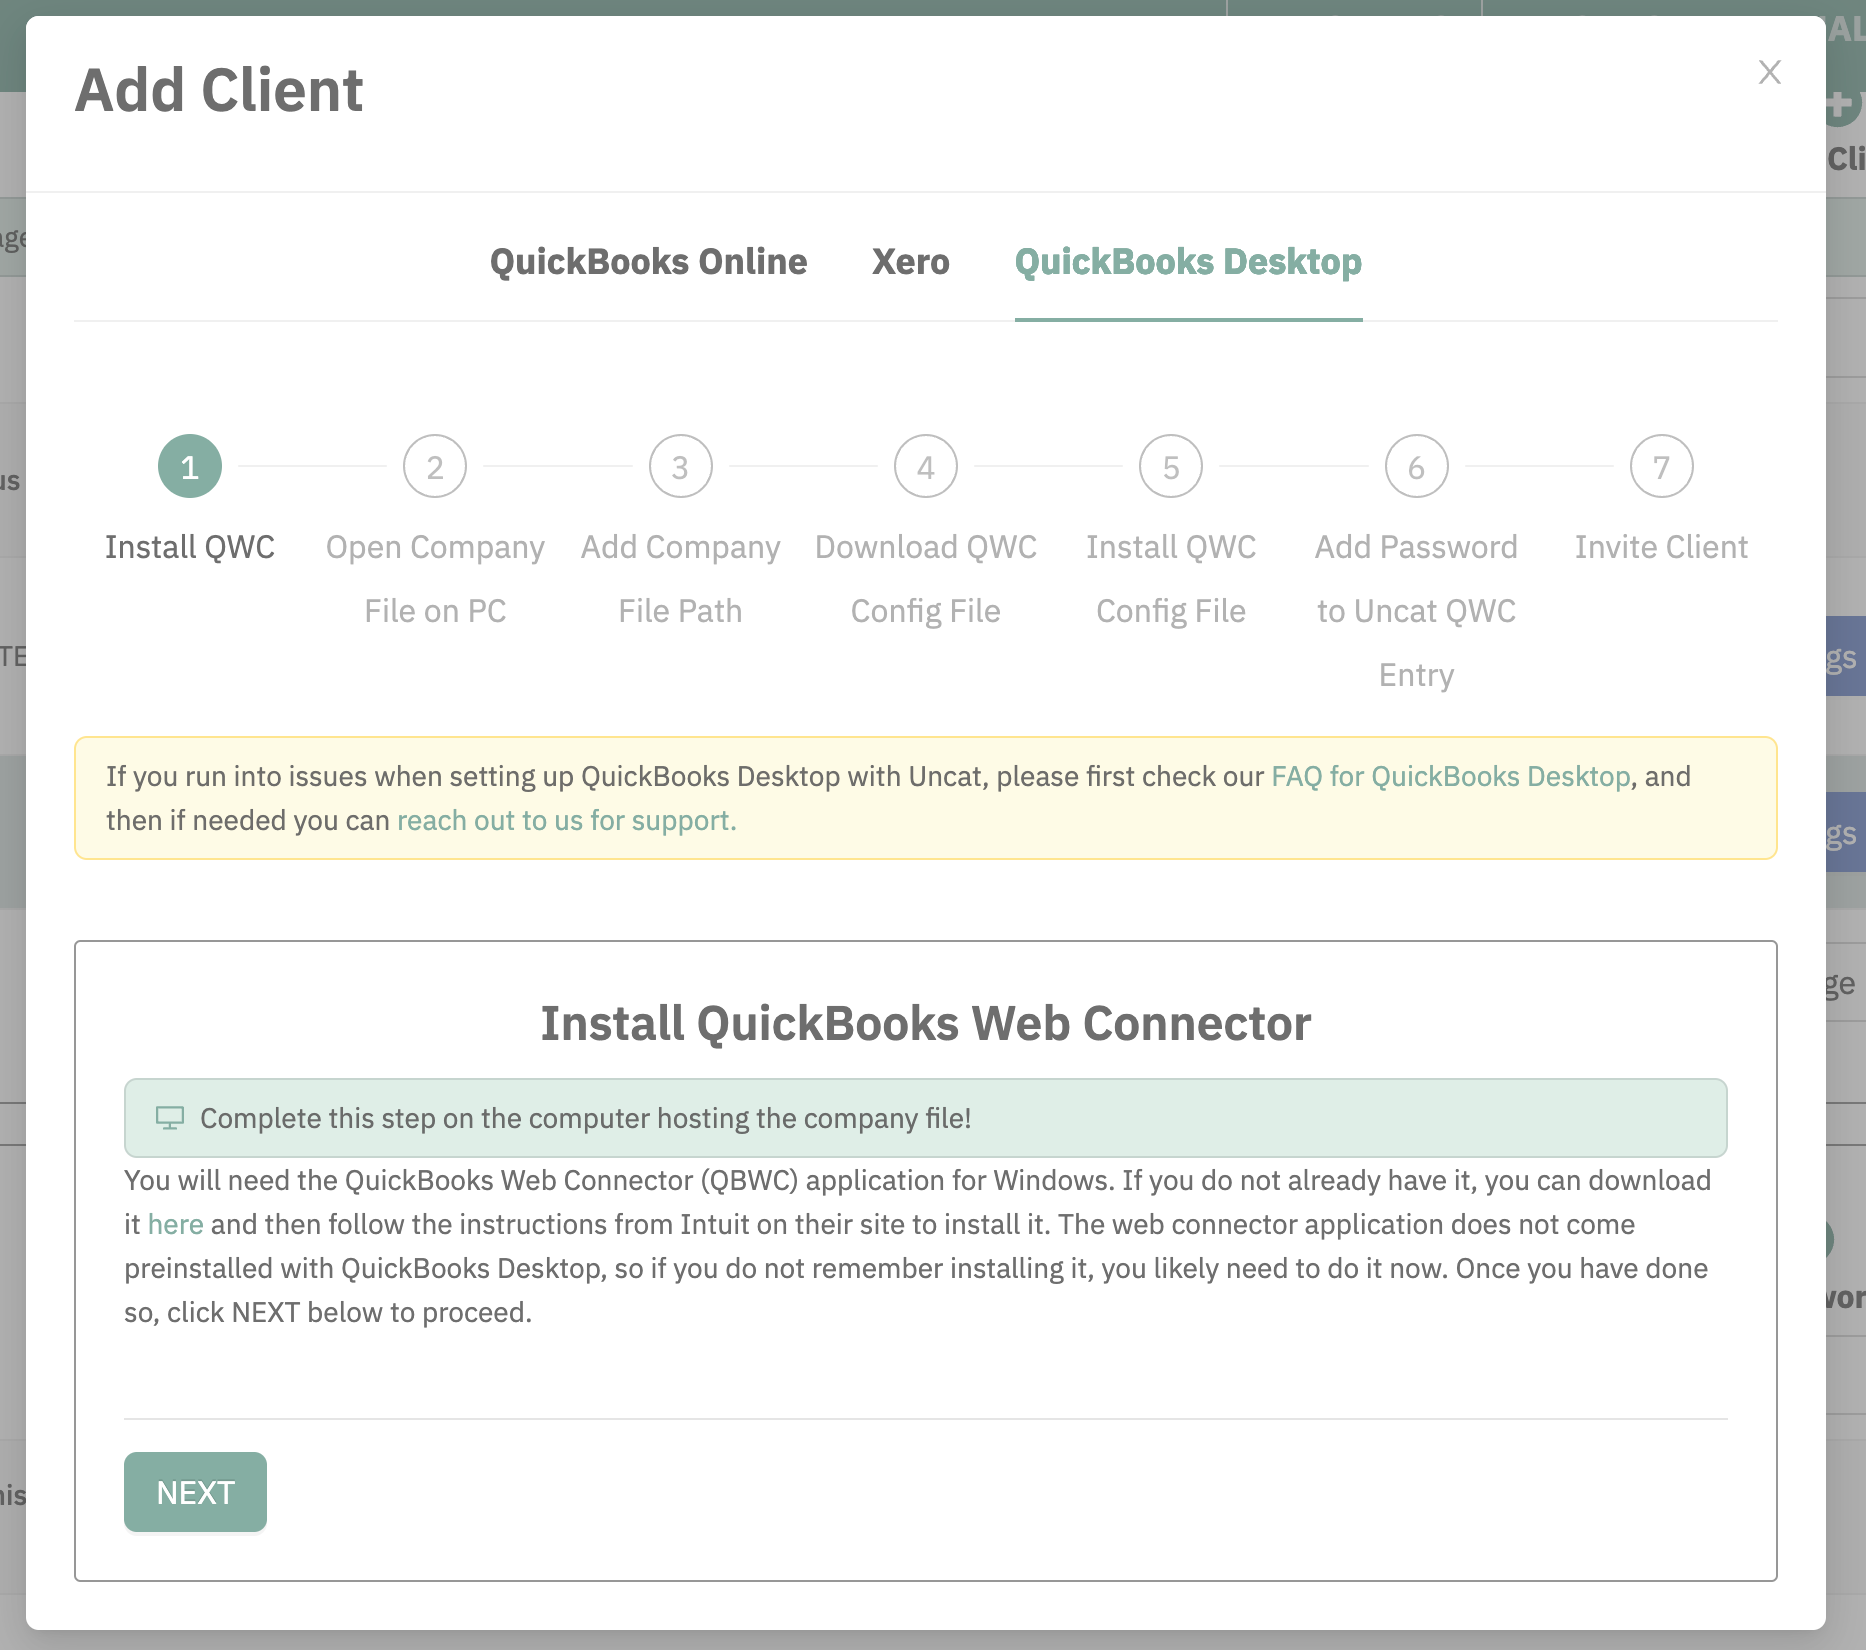
STEP 1: In Uncat, Click “Add Client” and then select QuickBooks Desktop. Confirm that you have the QuickBooks Web Connector application installed on your computer. If you don’t already have it, you can download it free from Intuit and install it.
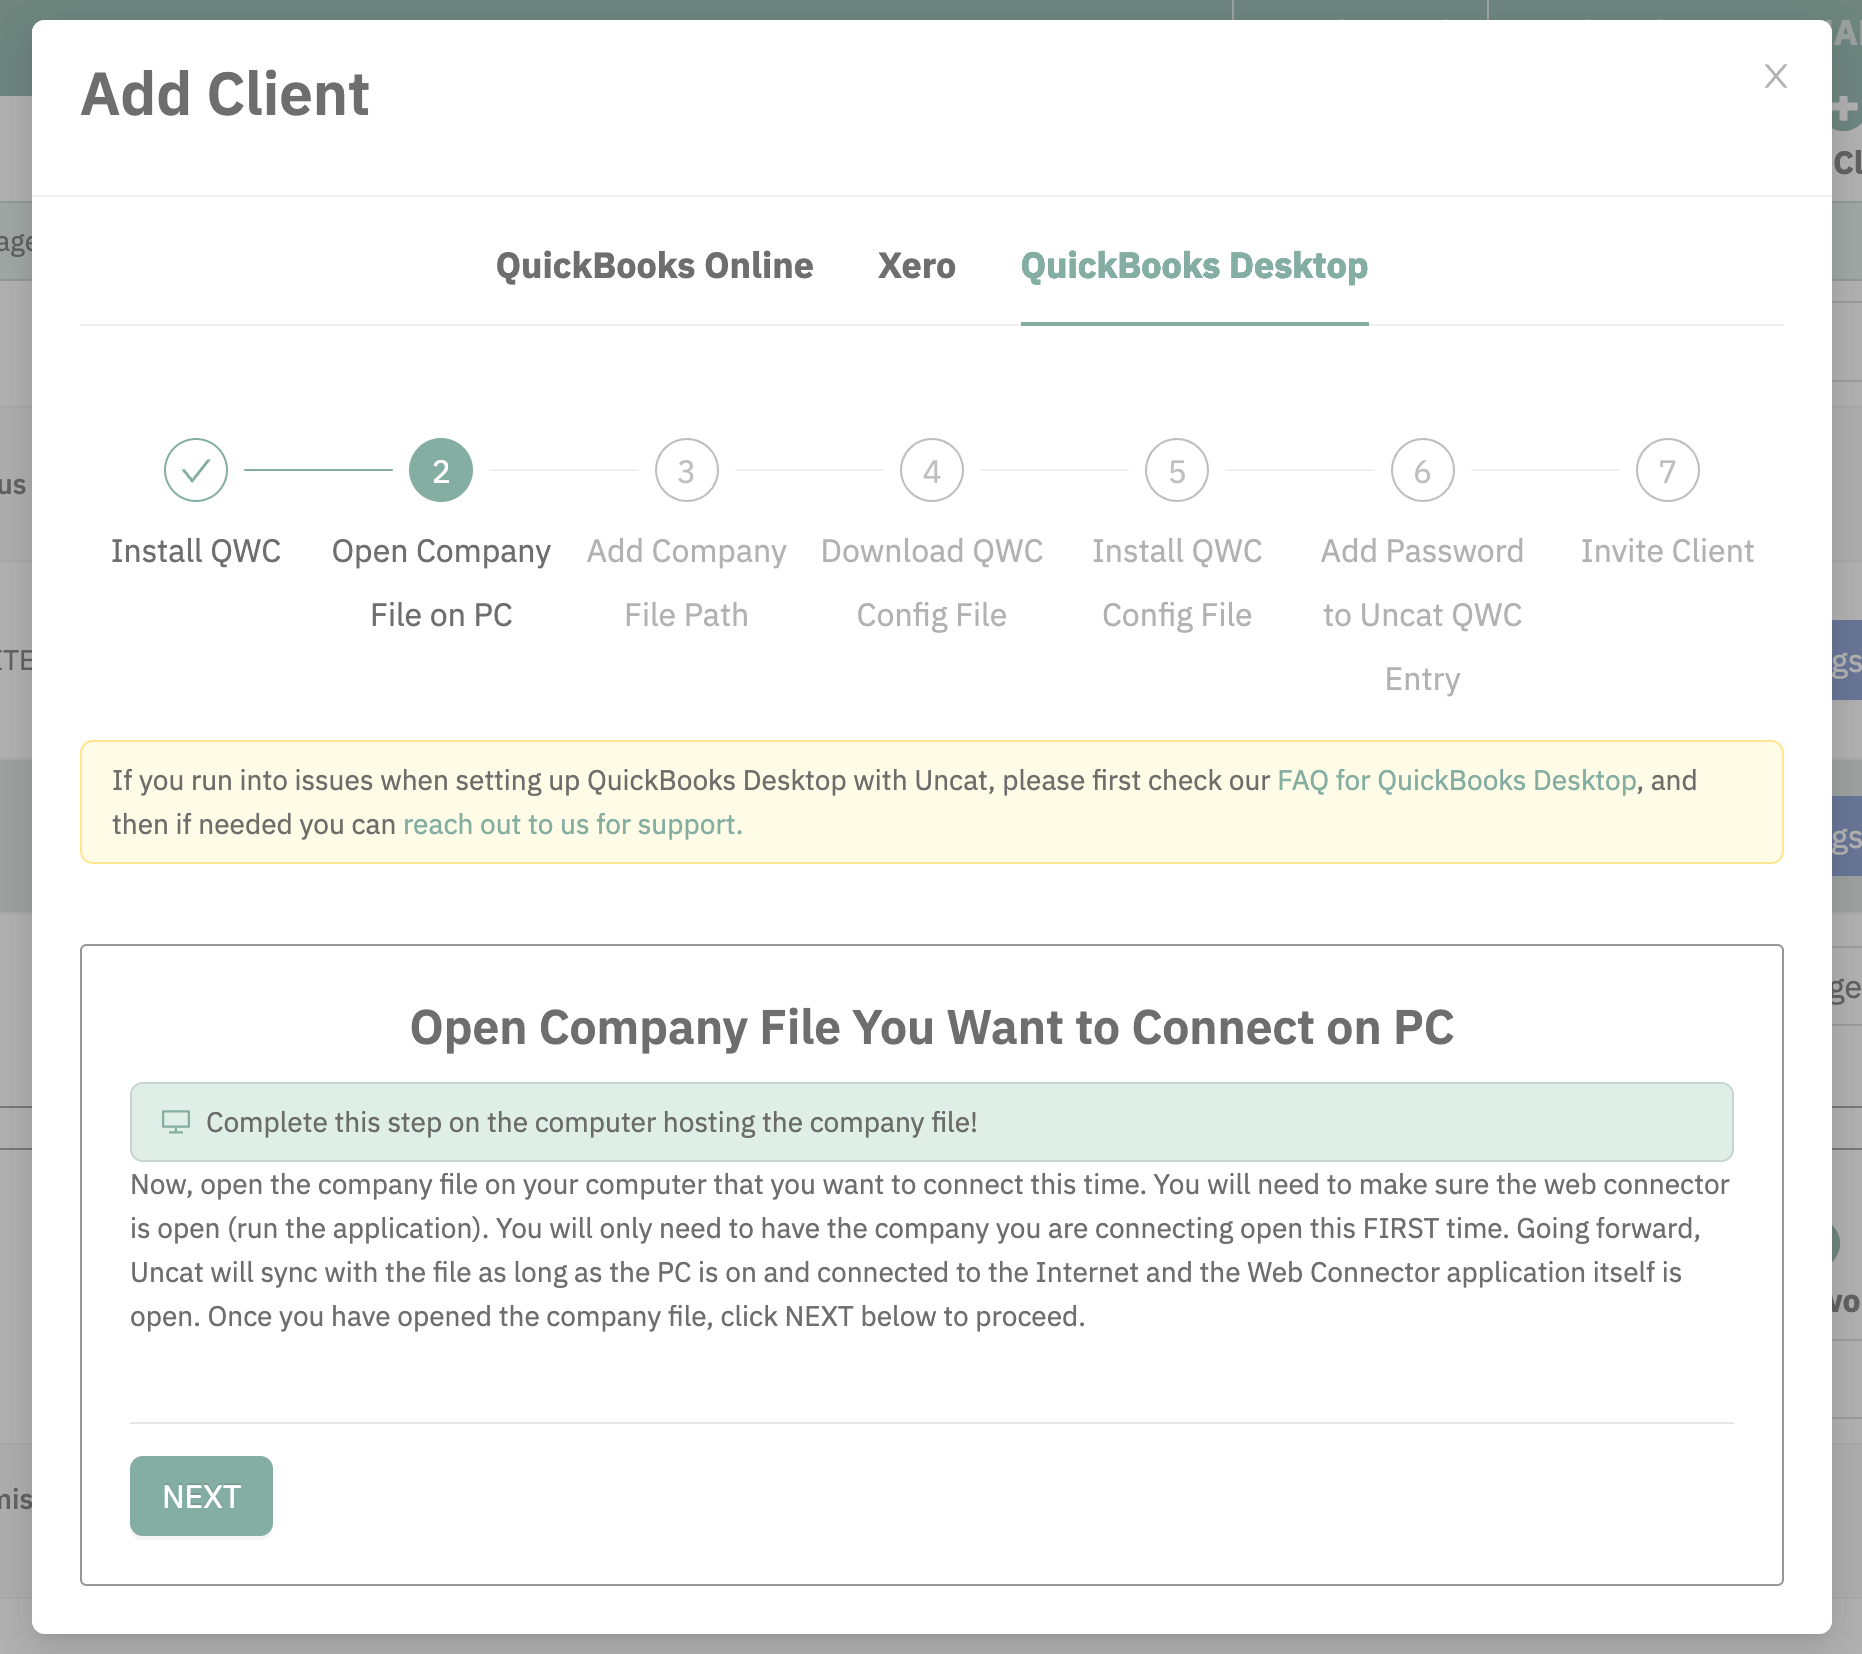
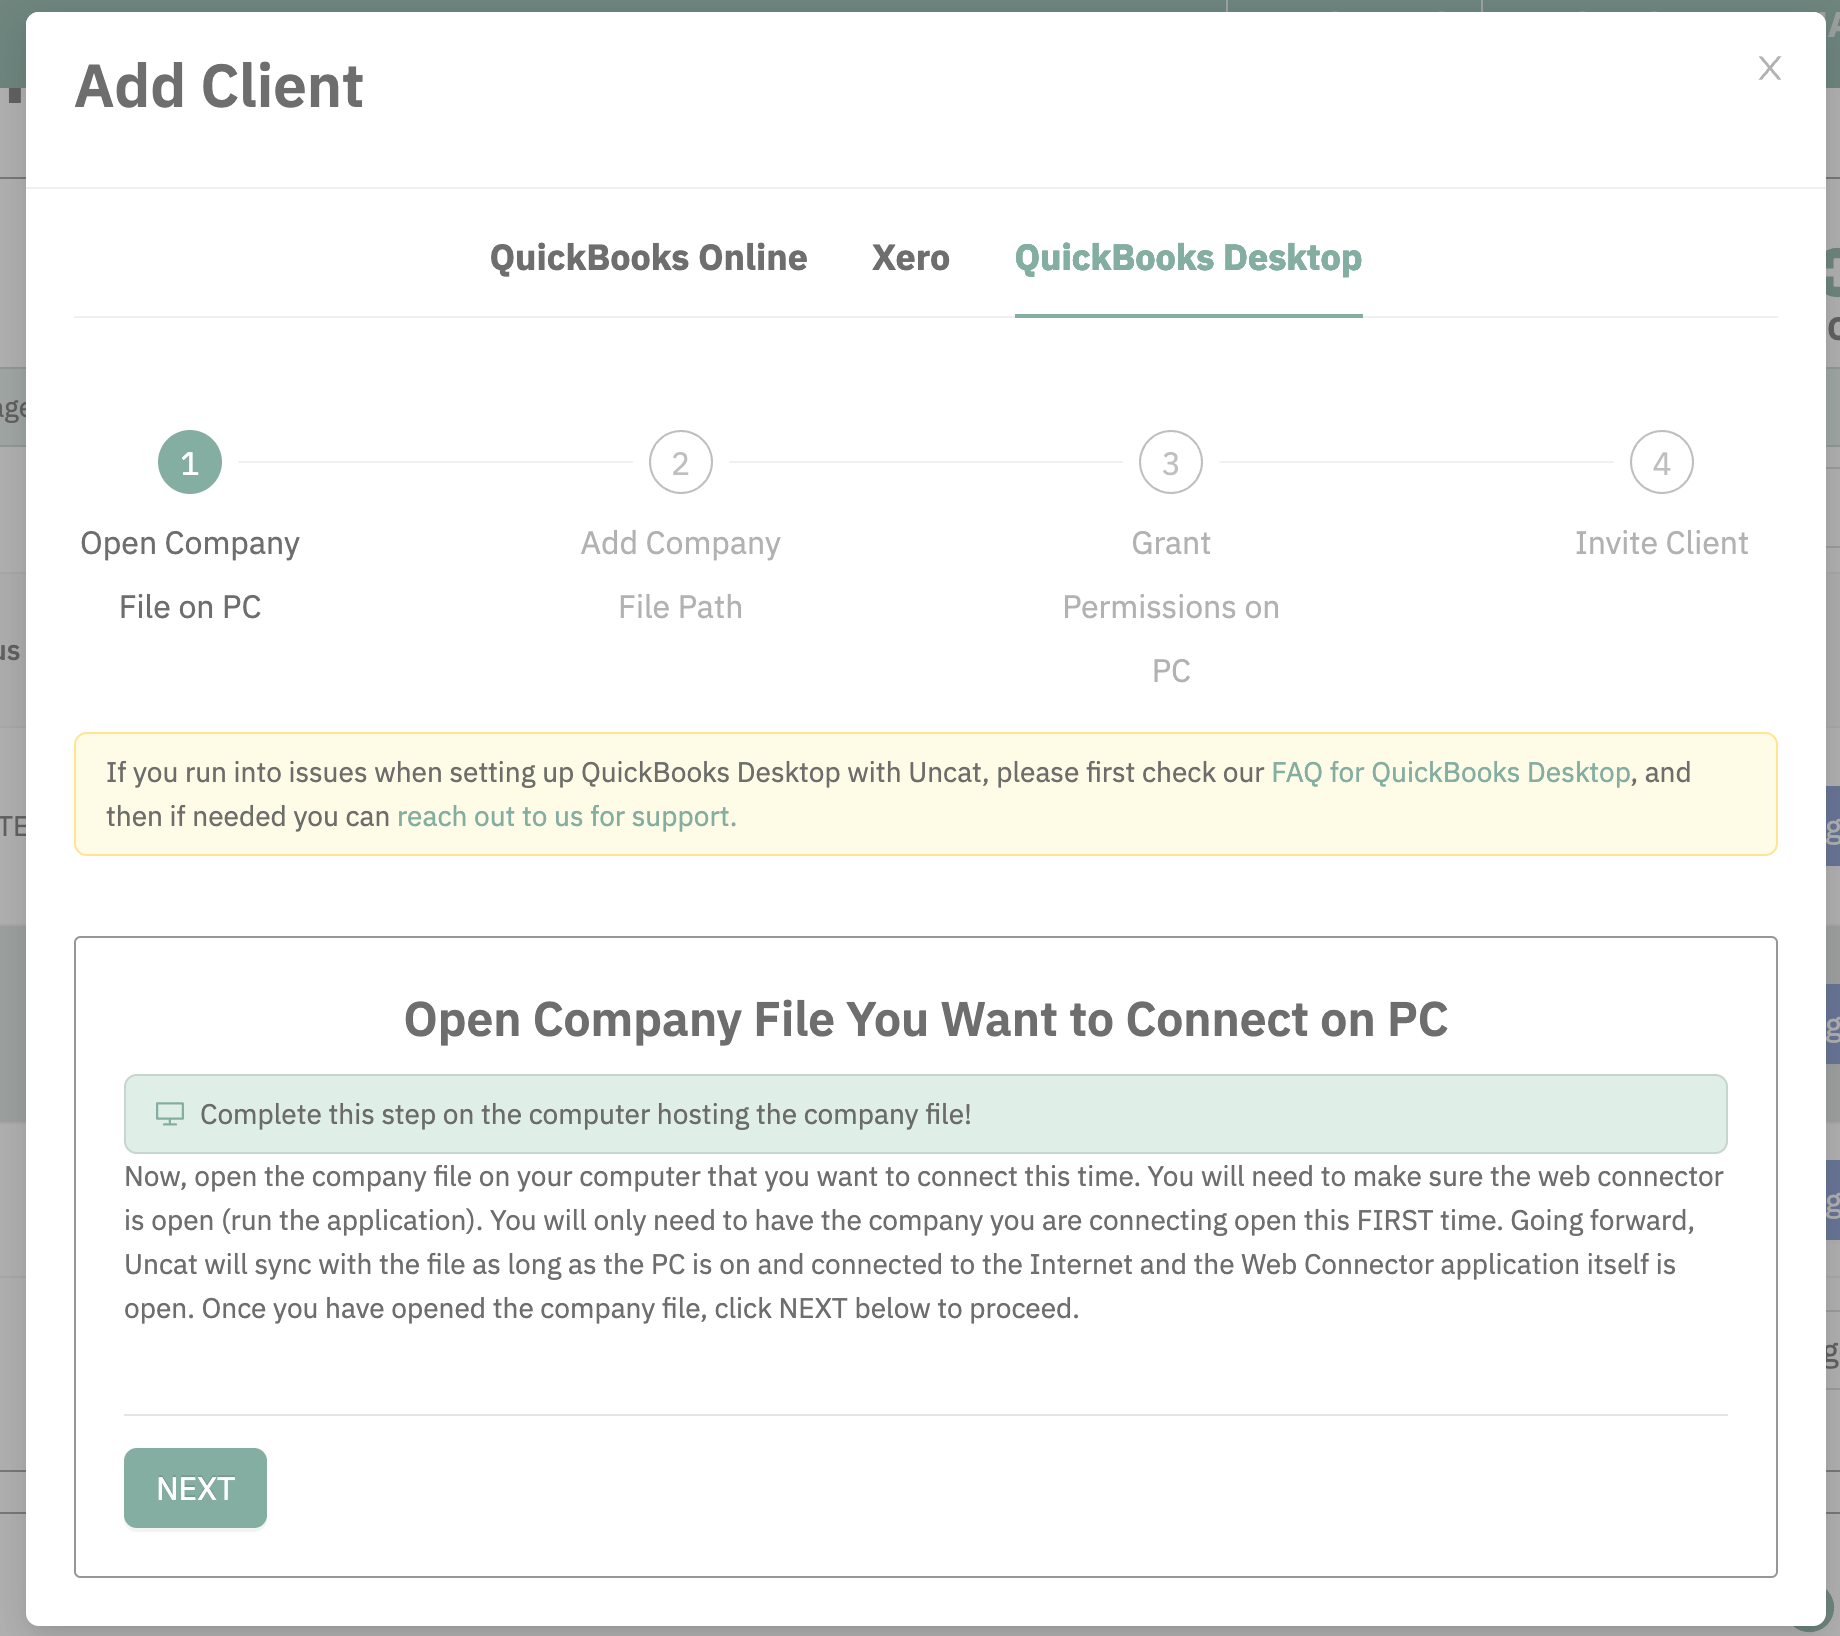
STEP 2: On the computer hosting the company file, open the company file.
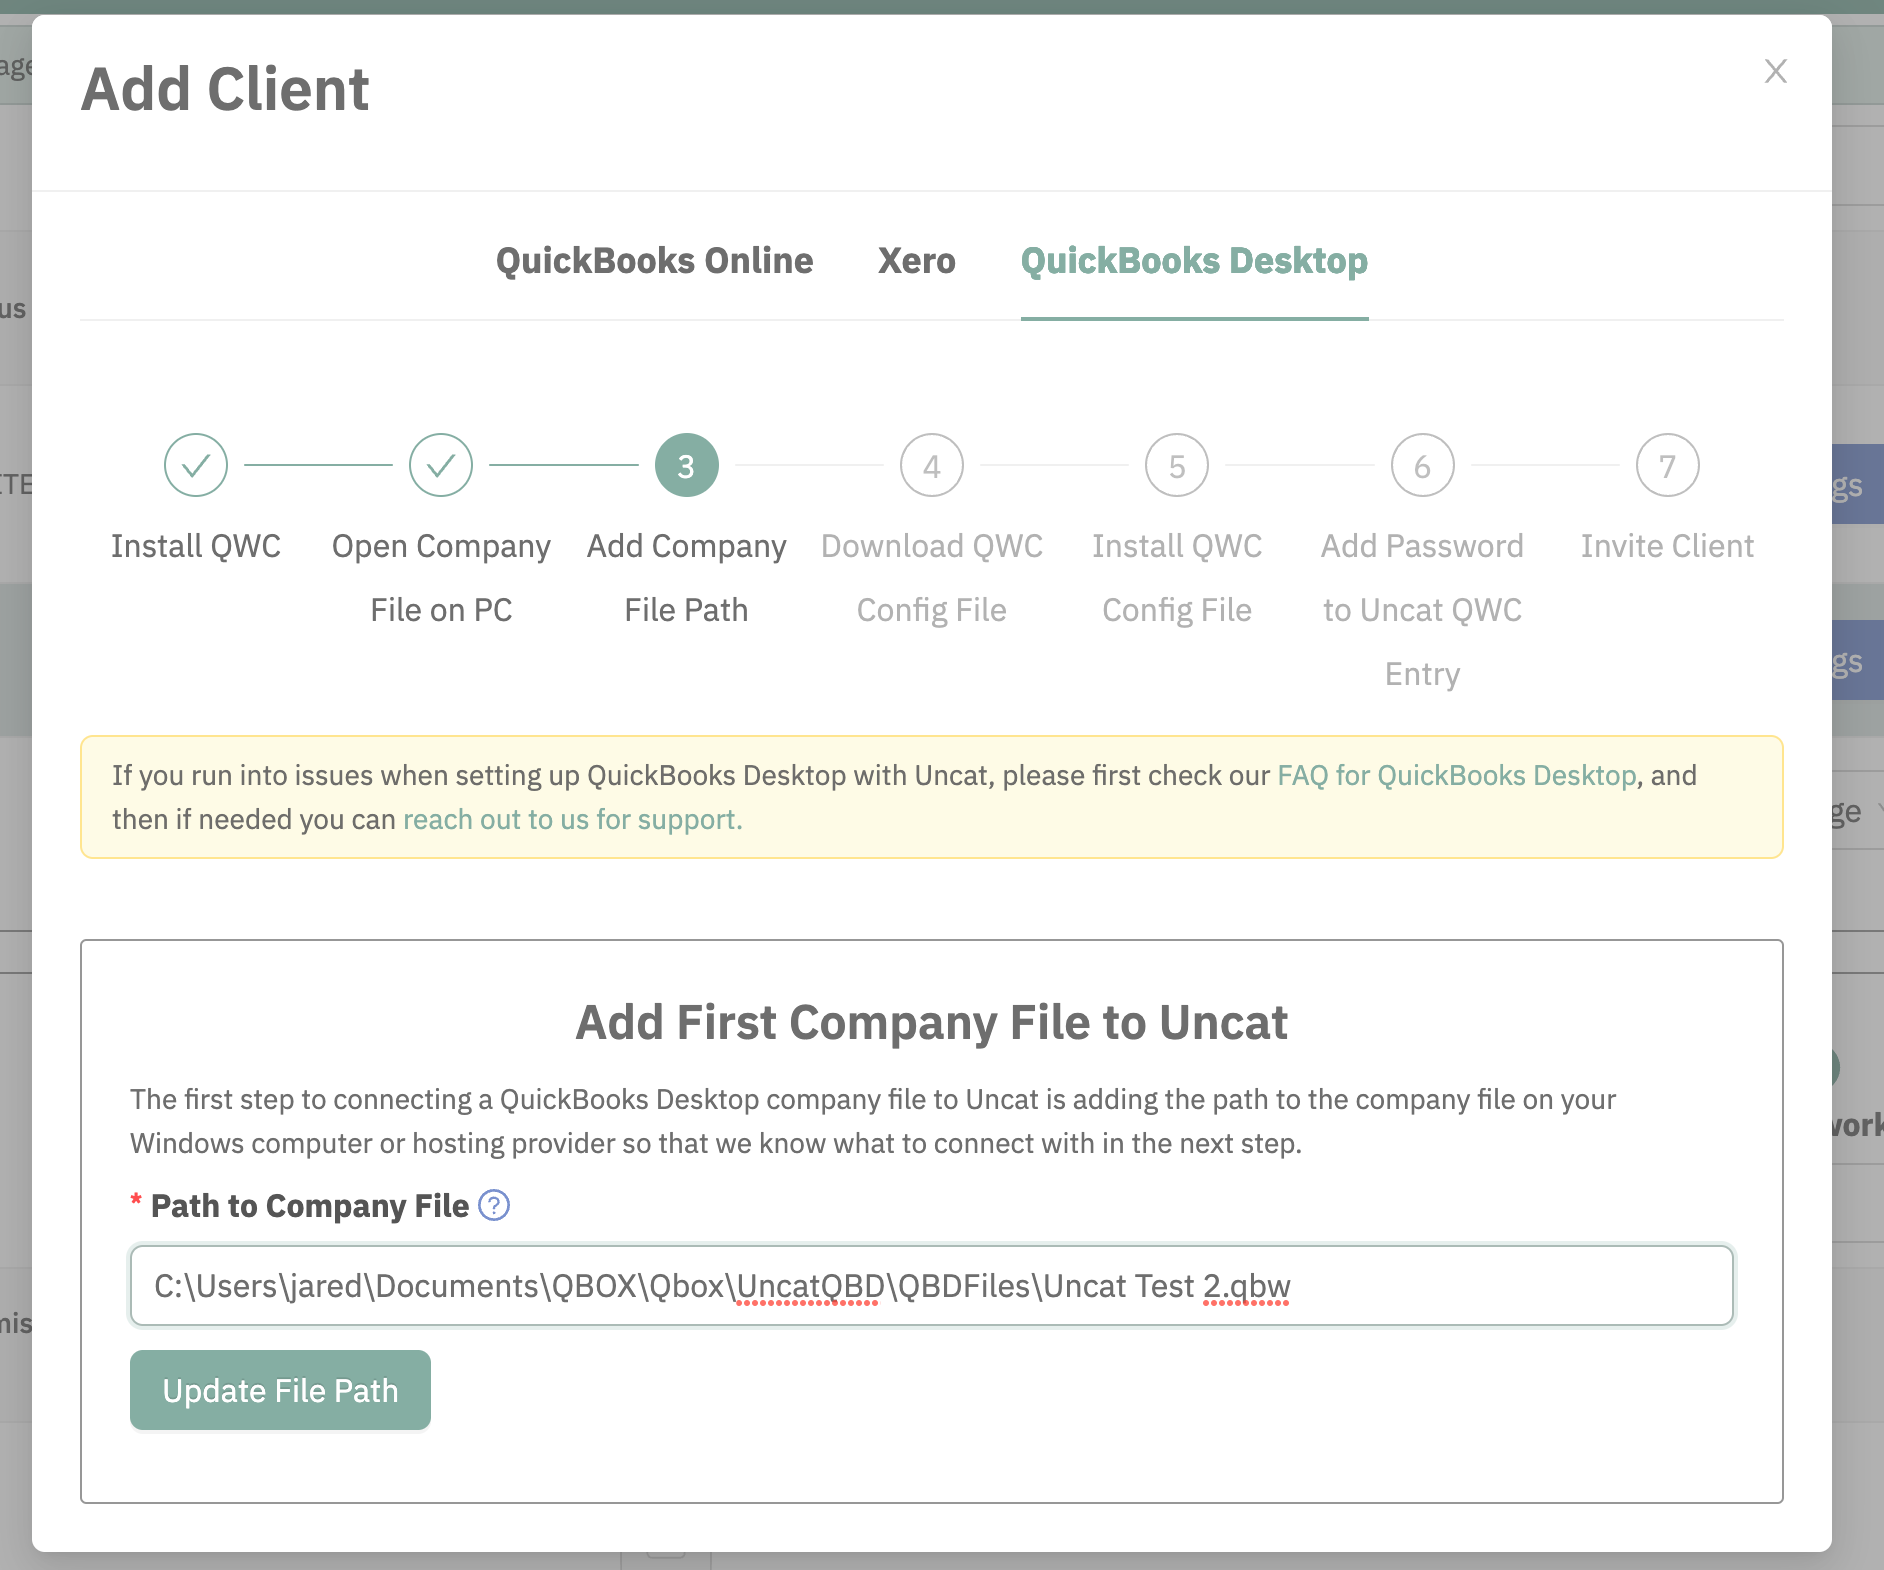
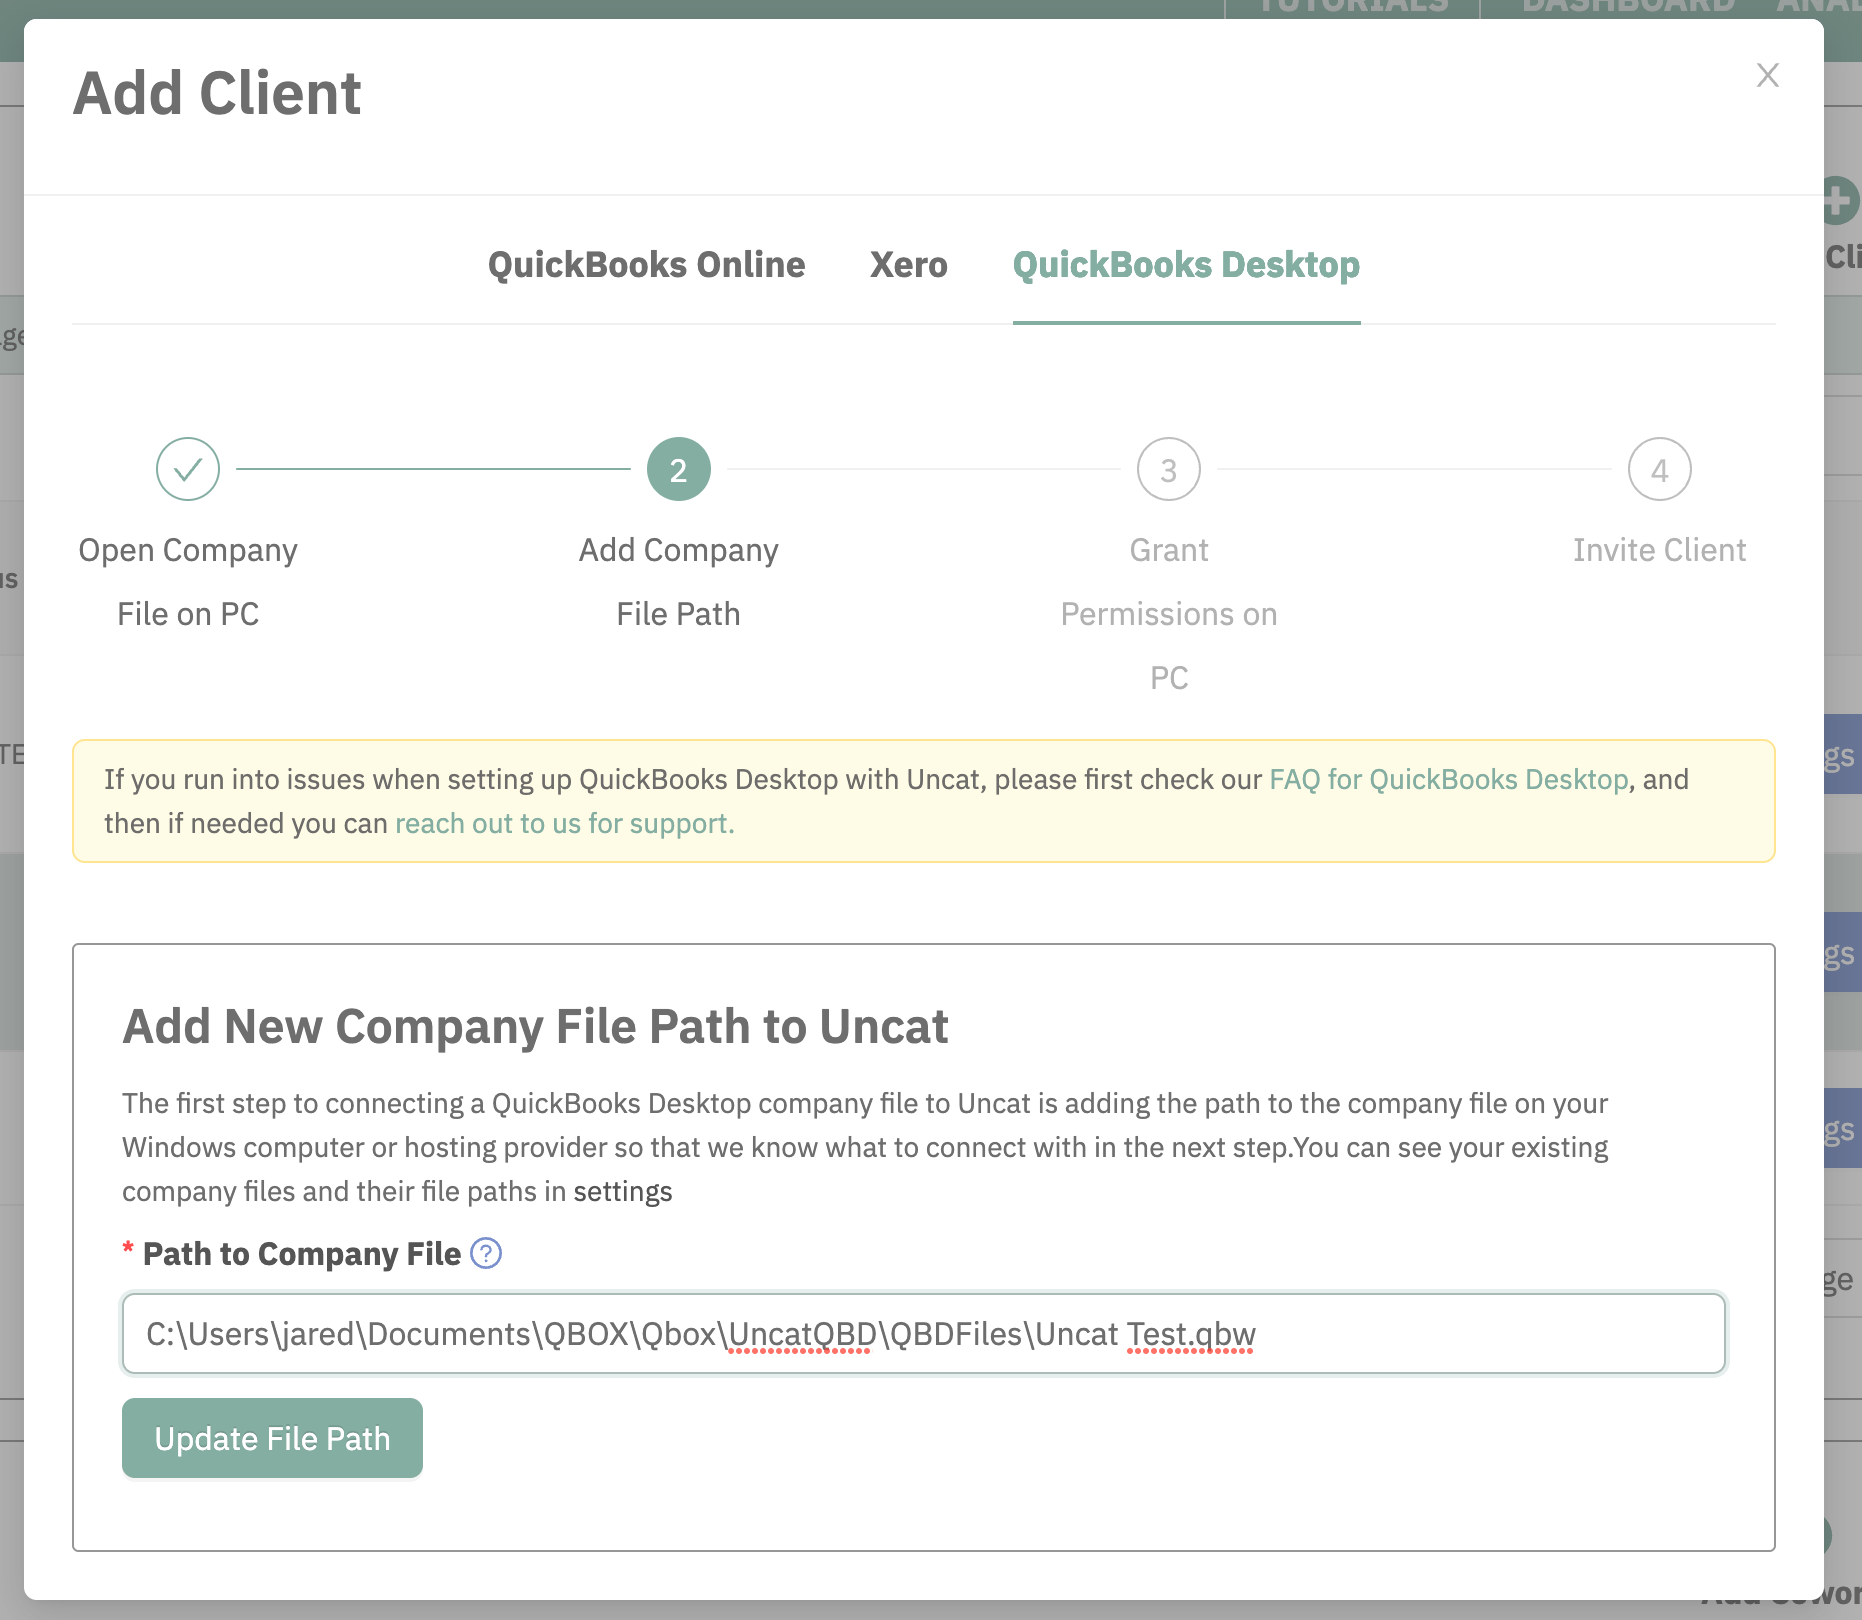
STEP 3: On the computer hosting the company file, copy the path to the client file. There are multiple ways to do this. One way is to press Shift and right-click the file, and then select "Copy as Path." Another way is to open the client file and press F2 and you’ll see it in under File Information on the left side of the window. Paste the file path into Uncat and click the Update File Path button.
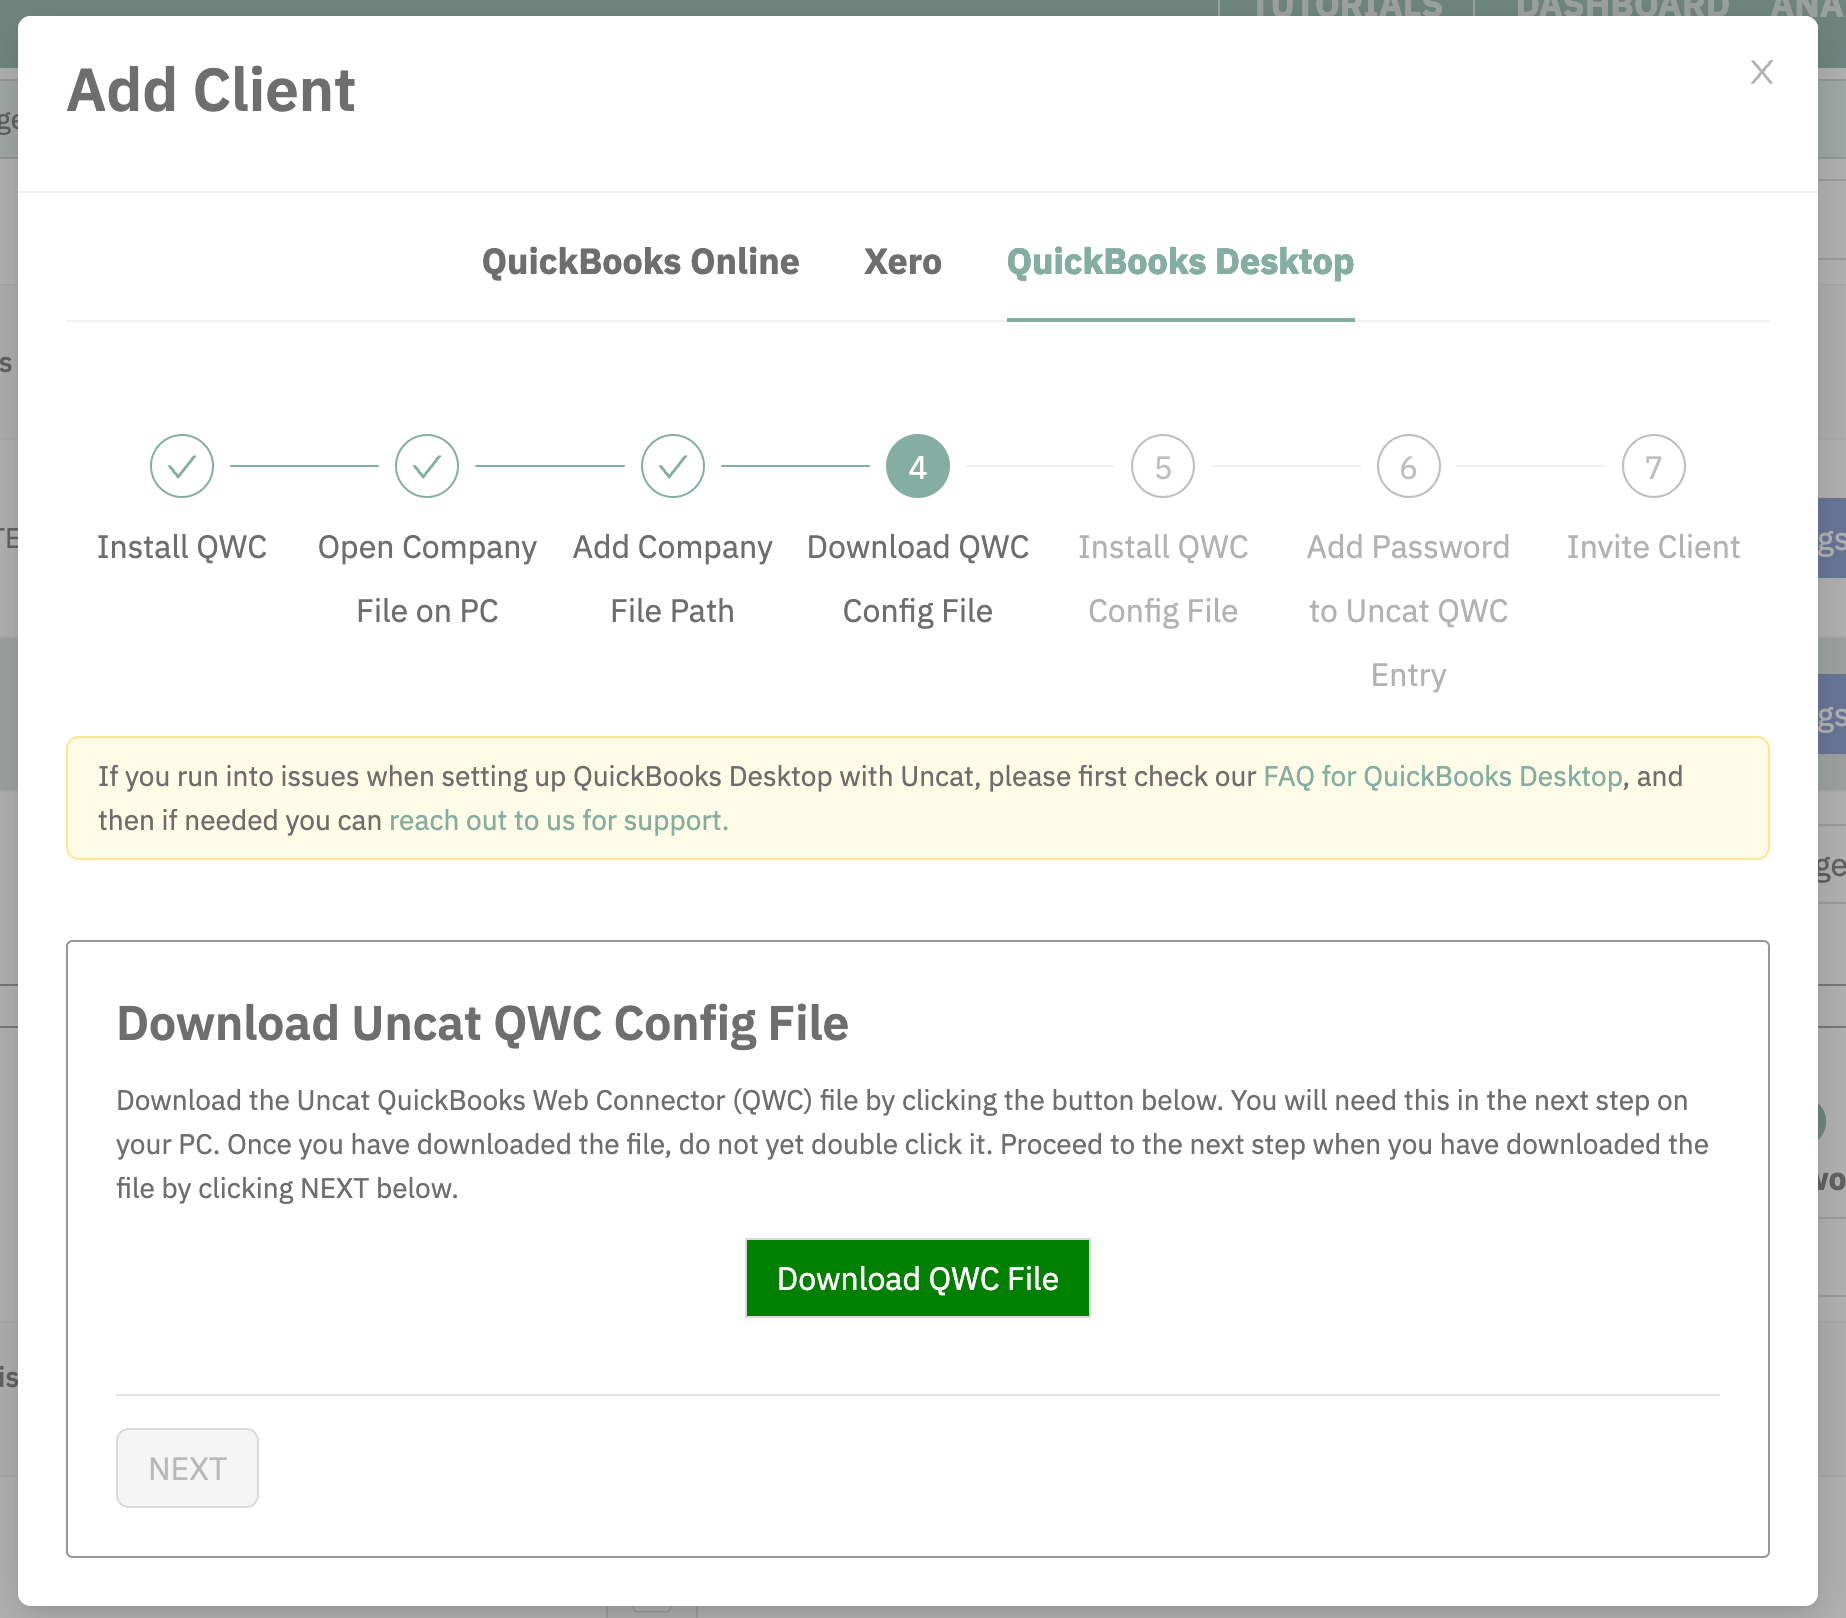
STEP 4: In Uncat, download the Uncat QWC Config File.
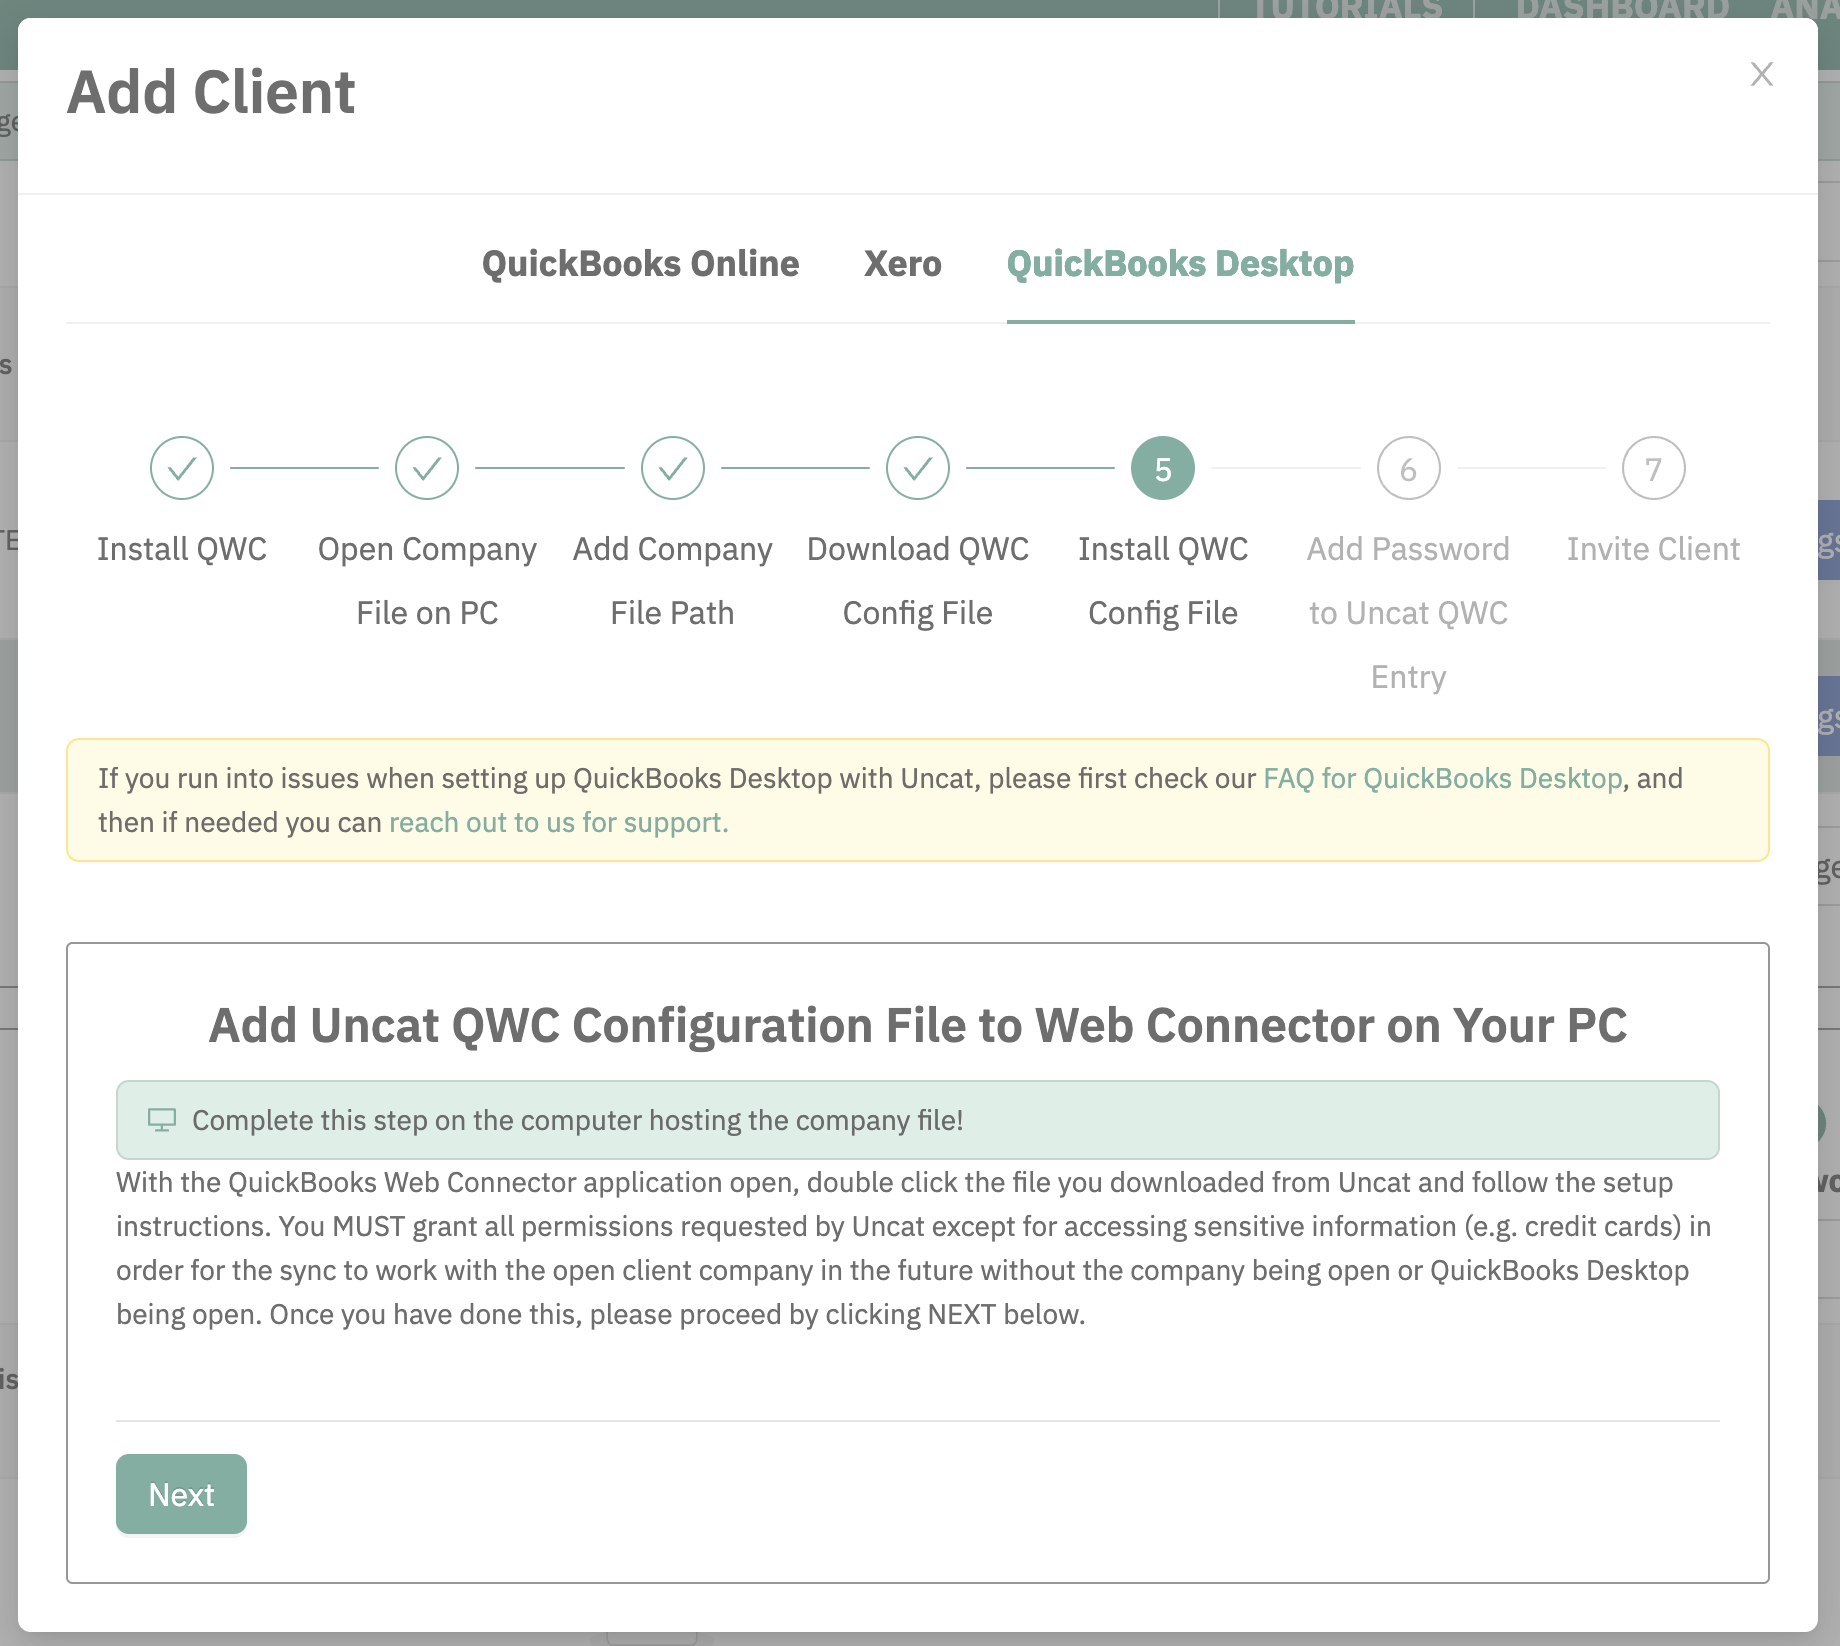
STEP 5: On your PC, add the Uncat QWC Configuration File to the QuickBooks Web Connector. With the QBWC open, double-click on the Uncat QWC file and follow the prompts to grant all the permissions (except it doesn’t need the permission to access sensitive information).
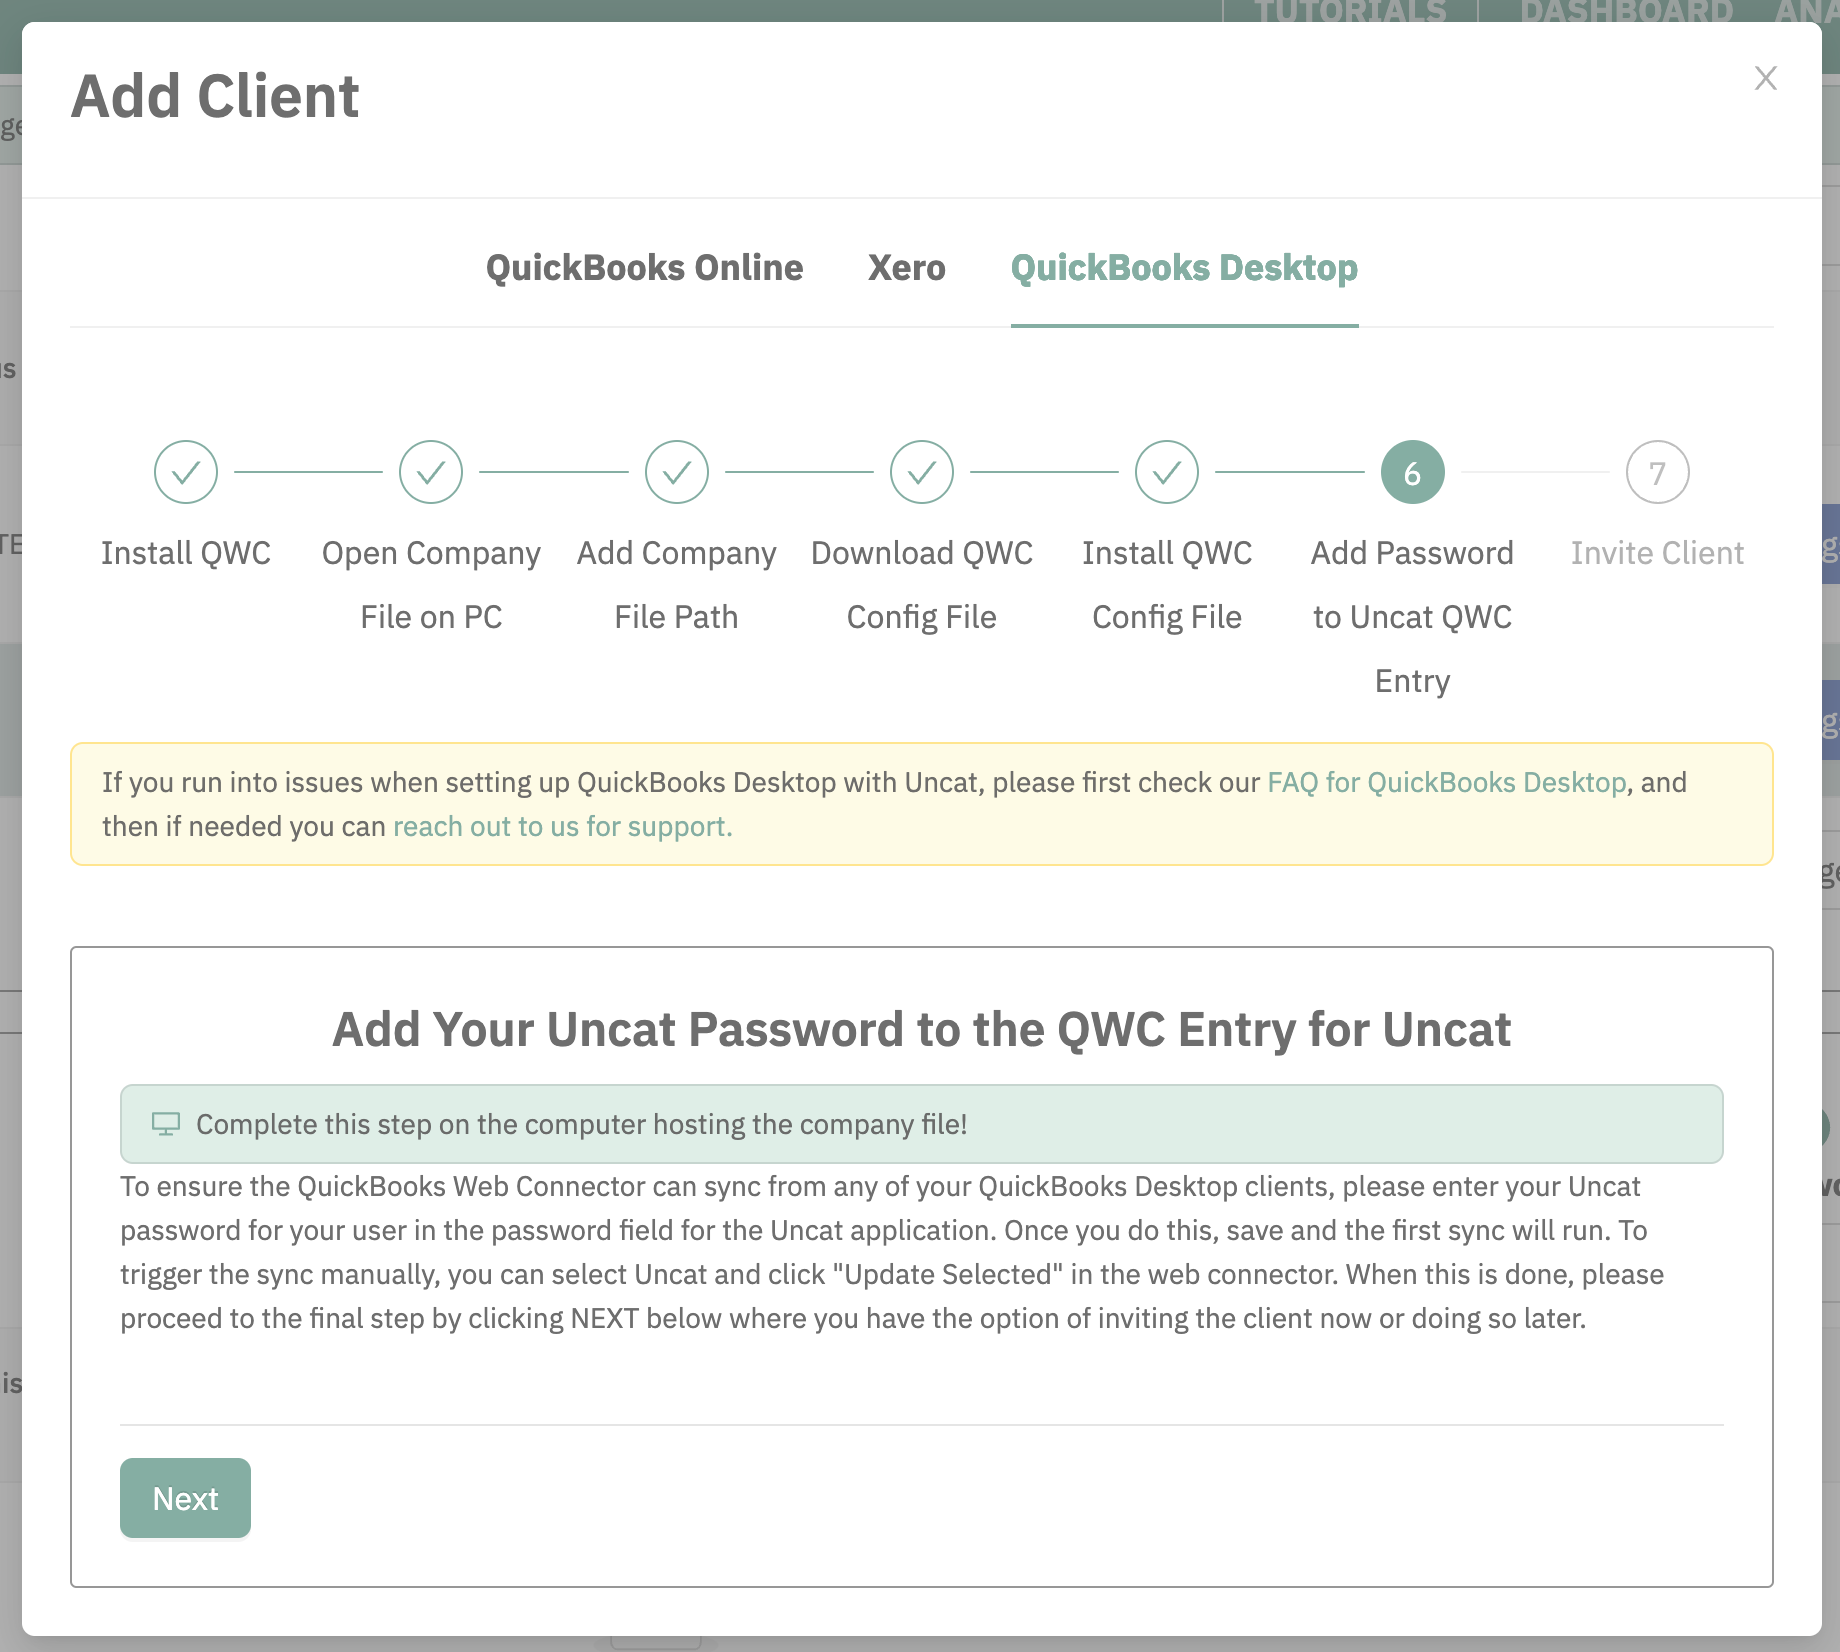
STEP 6: In the QuickBooks Web Connector, enter your Uncat password.
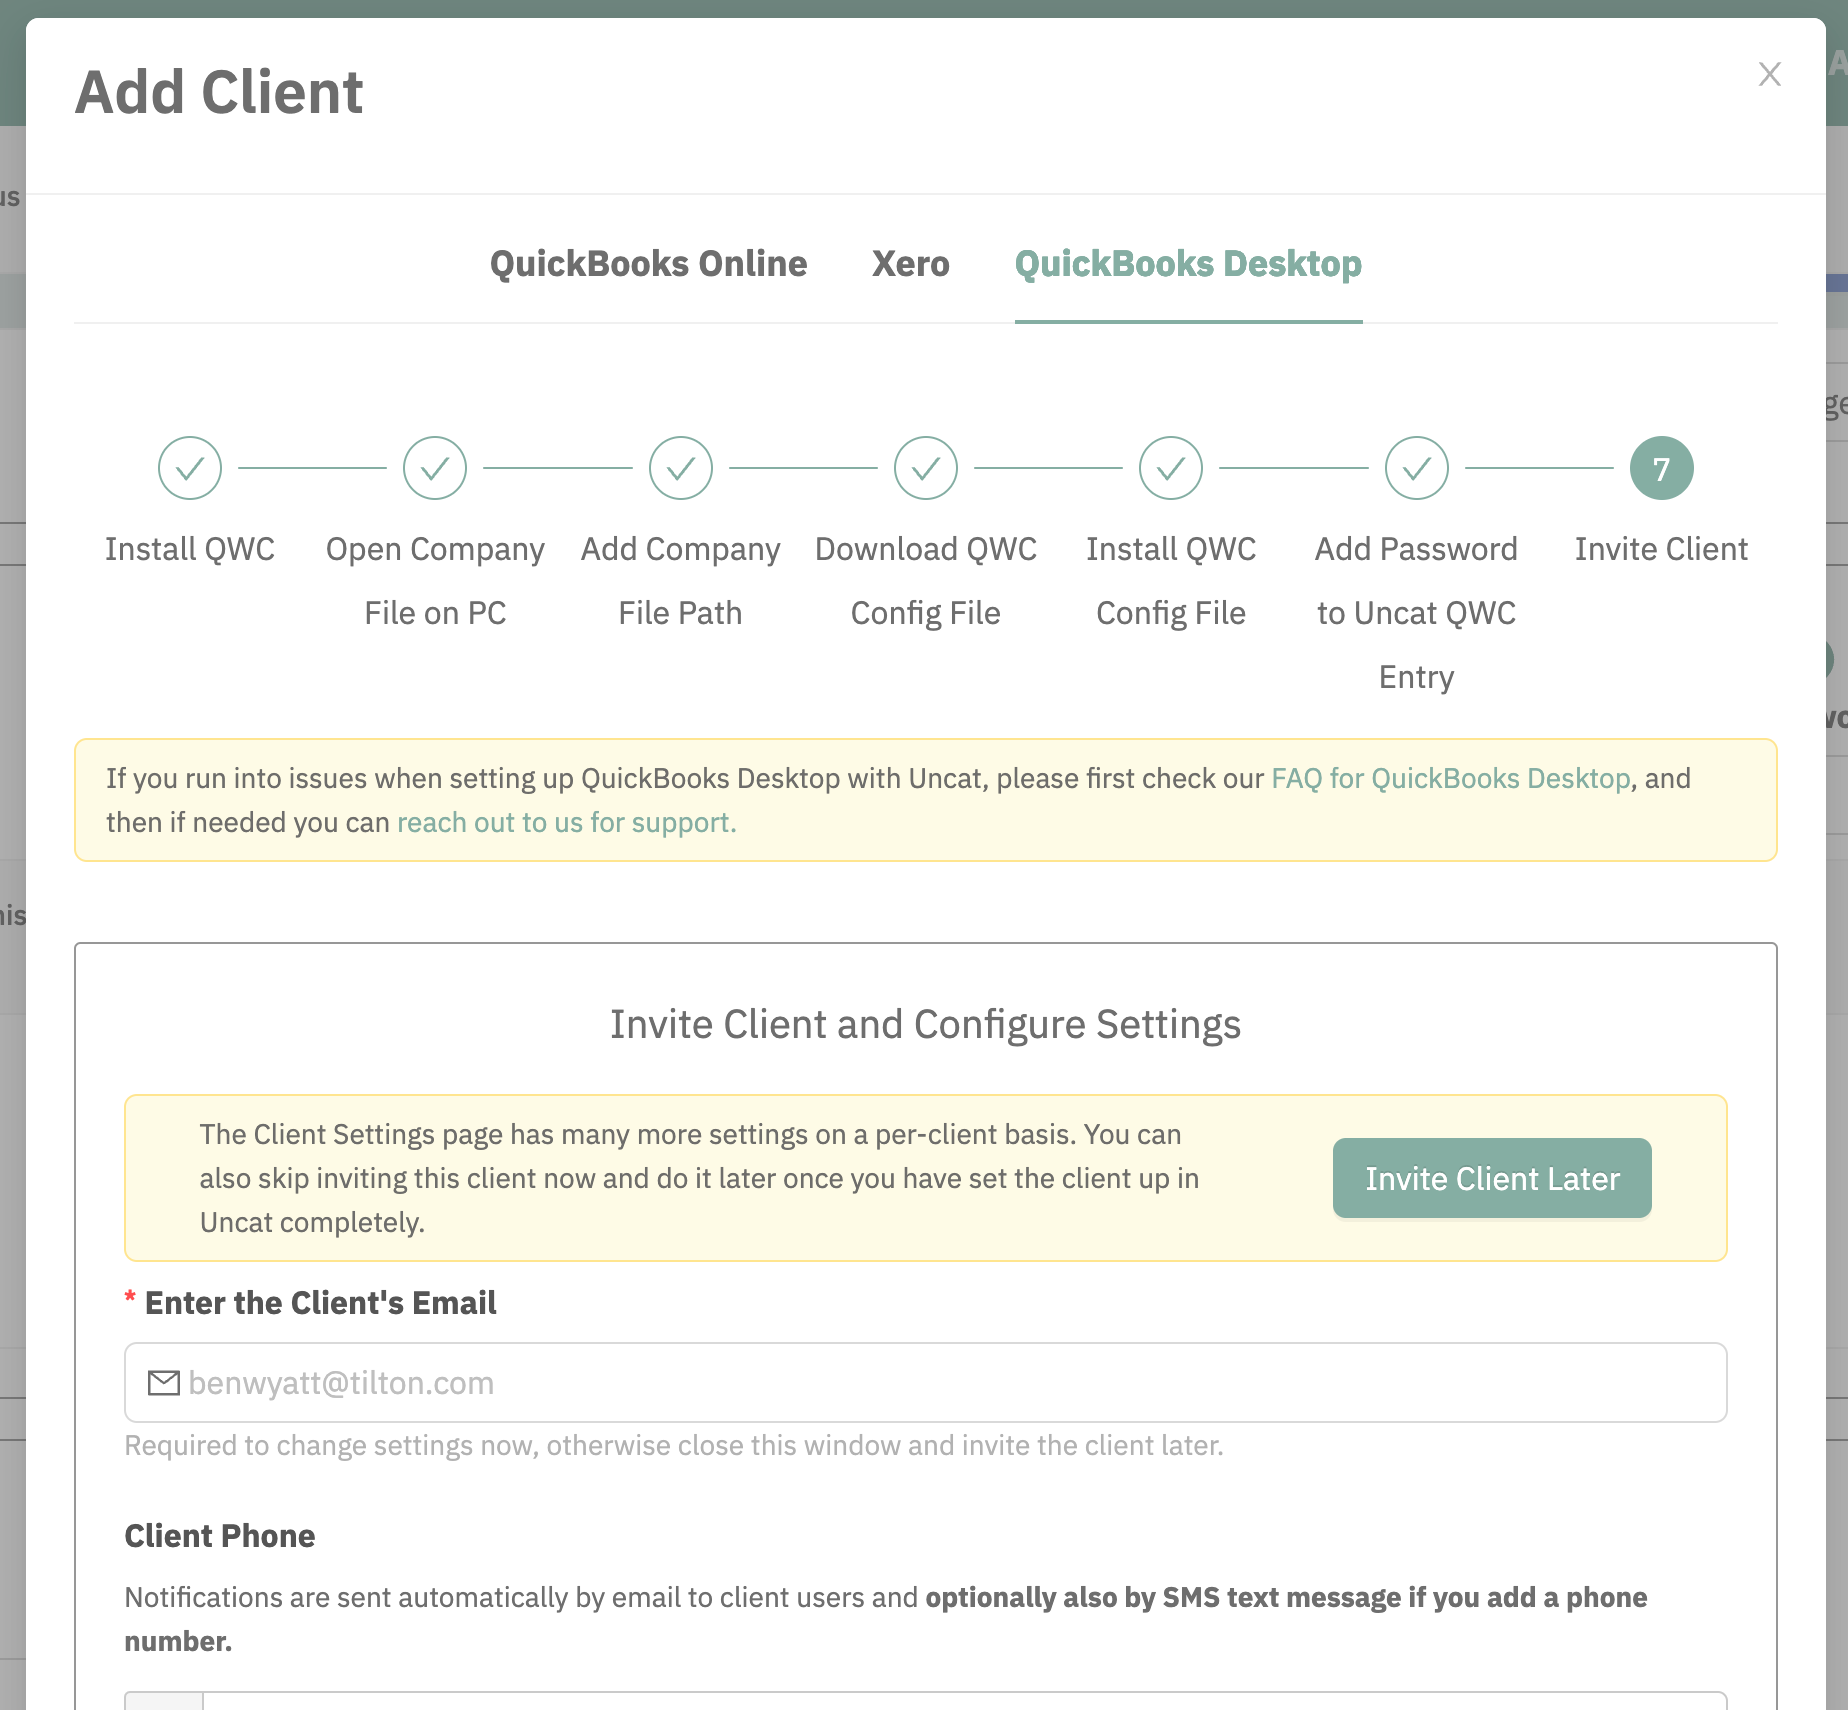
STEP 7: In Uncat, invite your client (or choose to invite your client later) and configure settings for the client (e.g. which accounts to sync).
Adding more clients:
STEP 1: Open the client file on the computer hosting the client file.
STEP 2: Copy the file path to the client file on your computer, and paste it into Uncat and click the Update File Path button.
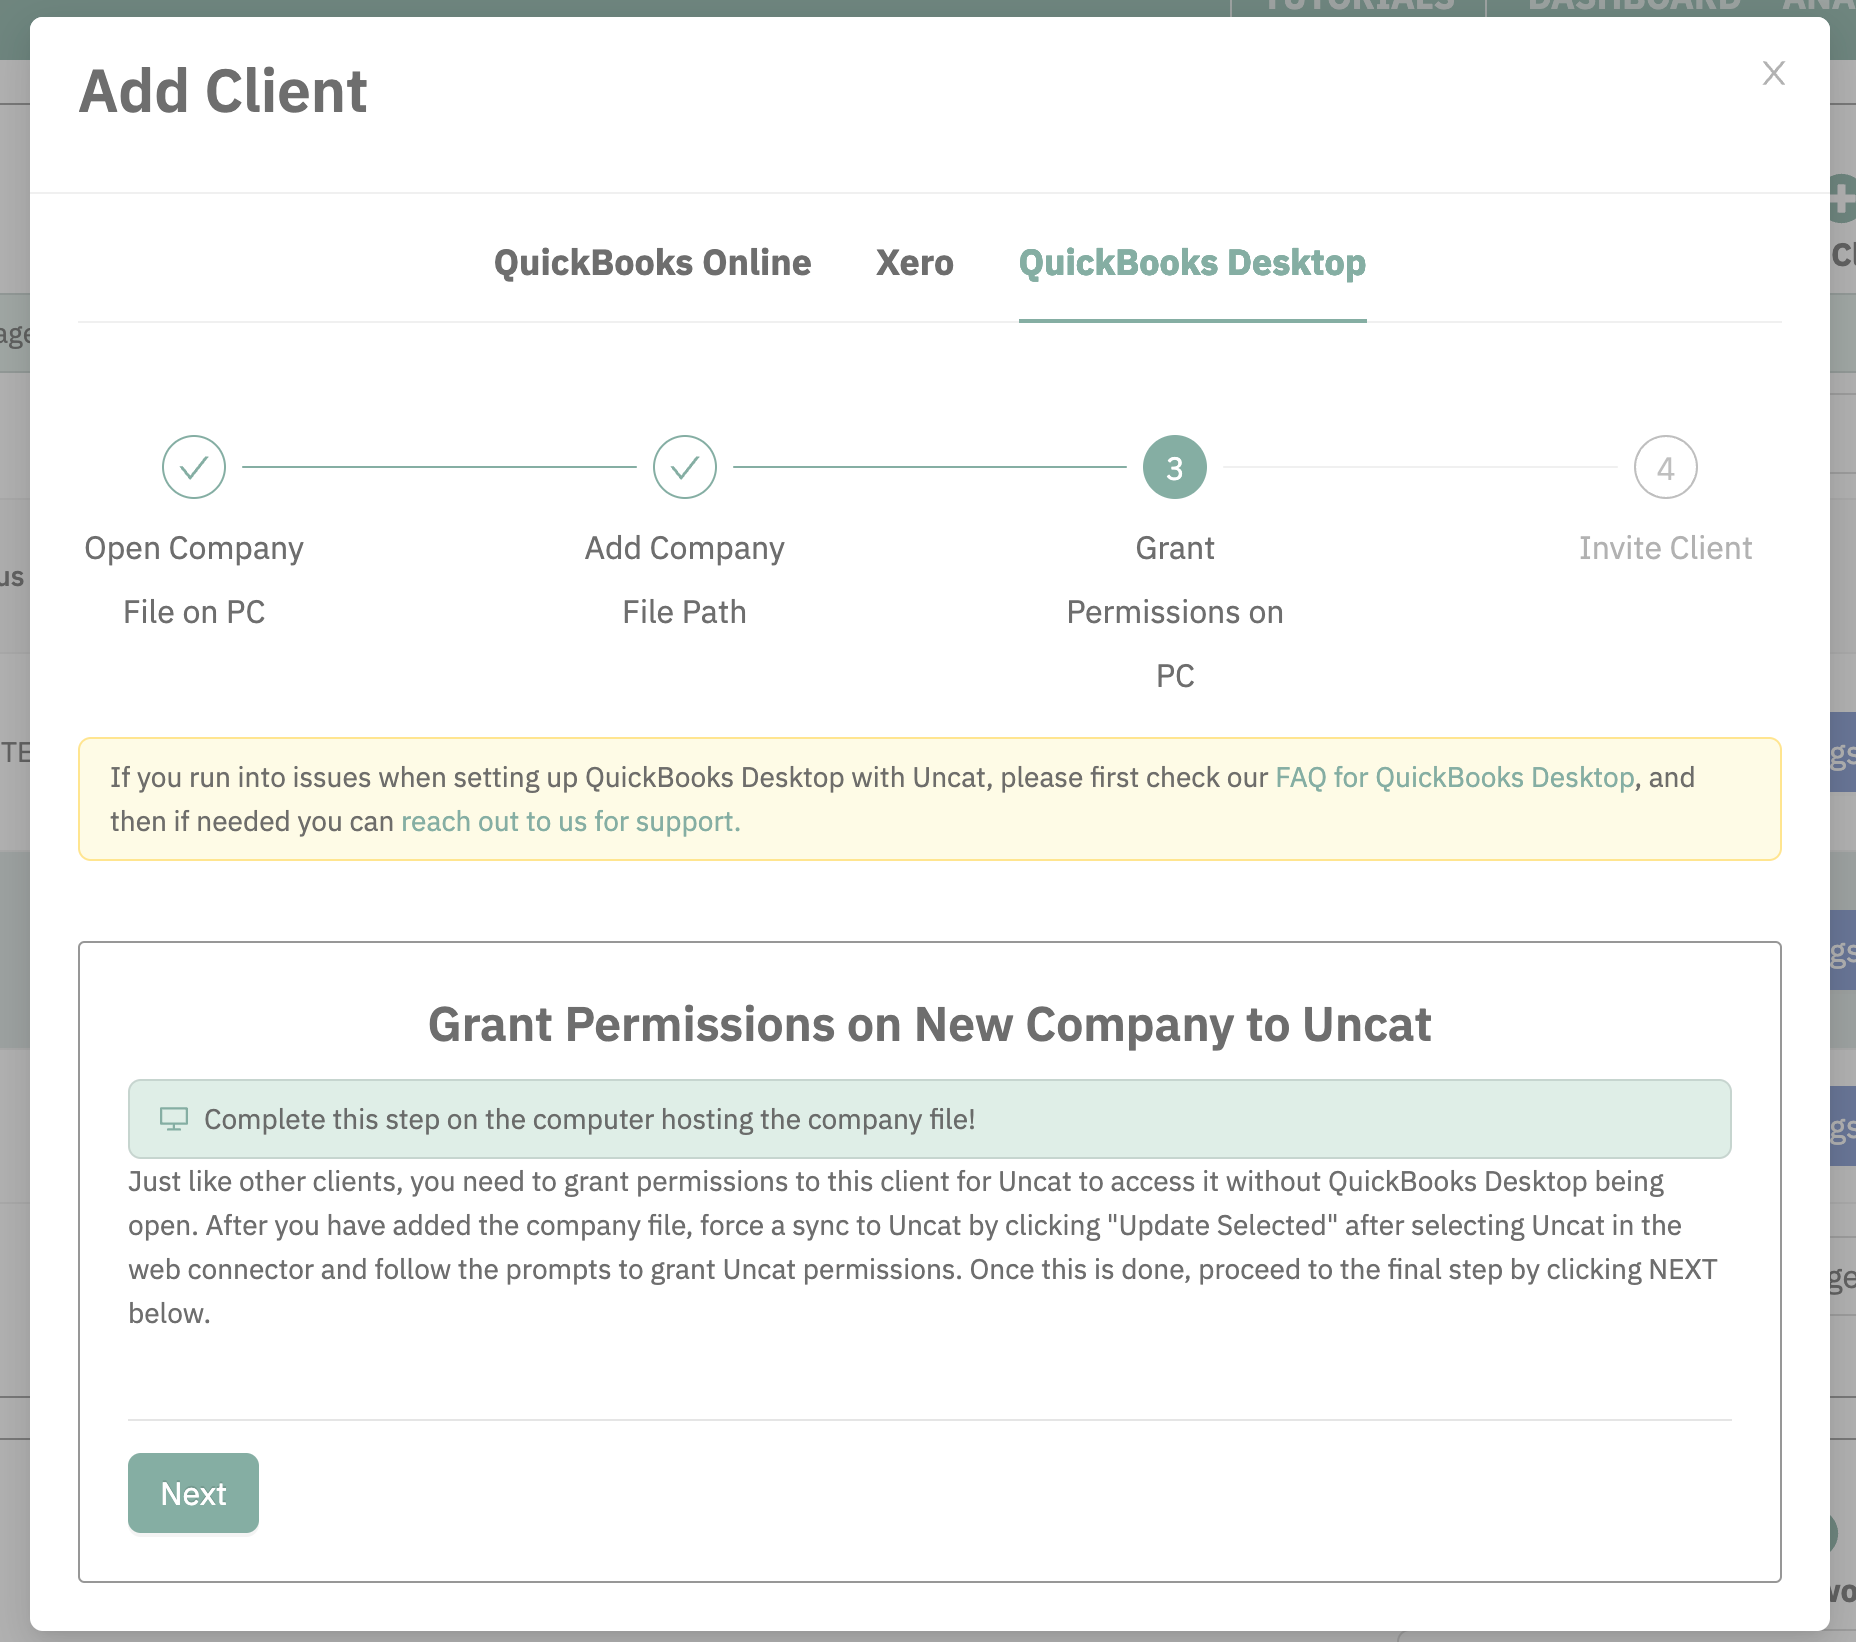
STEP 3: On your PC, go to the QuickBooks Web Connector and select Uncat and click the Update Selected button. You will get prompts to grant permissions to Uncat. Accept all the permissions (except it doesn’t need permission to access sensitive information i.e. credit cards).
STEP 4: In Uncat, invite your client (or choose to invite your client later) and configure settings for the client (e.g. which accounts to sync).
